- 11/29/2015 11:43:00 pm
- 0 Comments
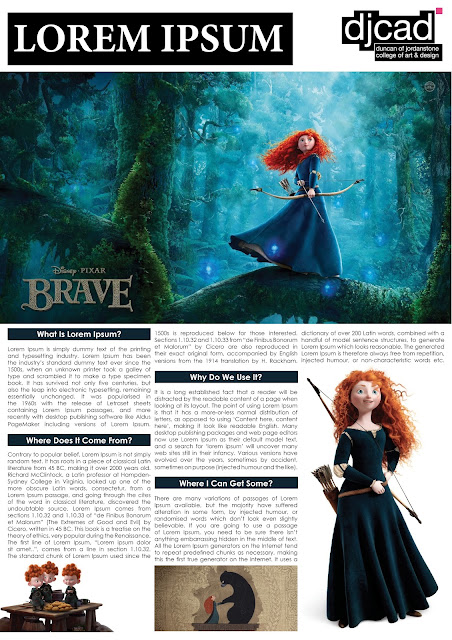
I already finish design my A1 Research Poster for next week final assessment and ready to print.
Here I put my research poster about how the movement of characters, personality and physical presence emotionally affect an audience.
- 11/28/2015 08:00:00 pm
- 0 Comments
So today after I try to finish up my poster research, I had modelling the tail and also shoes for this character. I also make an amendment to this character body because I forgot to add some detail on the sleeves and bottom of her costumes.
I will continue to model my character body before I move to the hardest part of face and her hands.
- 11/26/2015 09:29:00 pm
- 0 Comments
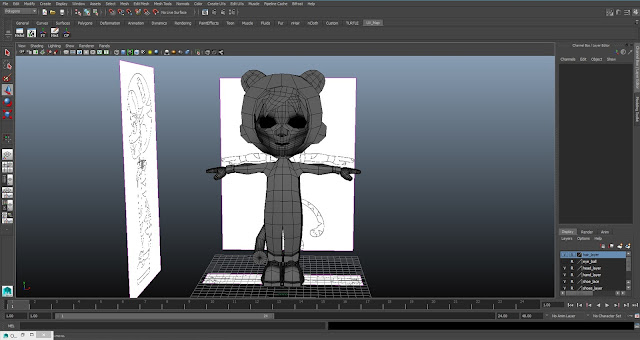
I've started with modelling the body of my character in Maya. I've practice to make a character body before this in Sean class. I started to put my character reference in a 3 plane panel from front, side and top. Then, I create a polygon to model my character body.
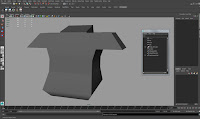
I continue to create this hoodie using polygon and will combine with the body later. There still a long way to go to finish my character.
- 11/25/2015 06:57:00 pm
- 0 Comments
My character model sheet that I'm gonna use for my 3D character modelling. Now I'm ready to model it in Maya using this four angle from front,back,side and top angle.
- 11/25/2015 03:50:00 pm
- 0 Comments
This is my character model sheet that I'm gonna use for my 3D character modelling. I focus on how the head will be look like and also after I open the hoodie. I also draw a detail on my character hands from side and top view.
- 11/22/2015 08:28:00 pm
- 0 Comments
This week we continue to model the ear and also hand for this character. We create a new polygon for the ear and combine it with the head.
To create hand we use the same method using the polygon. We modelling the hand base before we add the fingers and join all together.
Before we end the class session, Sean show us on how to use the Quad Draw from the head model that he already done. It's quite easy and difficult at the same time to match with the head.
I think I quite fun to learn all this new things here even with all the hectic going on in my head.
- 11/21/2015 10:30:00 pm
- 0 Comments
I finally had come out with my storyboard drawing for my little tiger. So, basically this story is about a day of little tiger who can change into a little girl wearing tiger costume. It has 12 frame and start when the camera show that she is laying up on the branch until she change herself into a little girl and open her hoodie.
I will update again with the colour storyboard and also animatic for this story.
- 11/18/2015 10:44:00 pm
- 0 Comments
Today we had a lesson with Phil on how to produce a good research poster that can attract the audience to read. We use Adobe In Design and create a layout with the A1 template.
Here I put my exercised for today using Adobe In Design with Portrait and Landscape orientation.
I also have been use Adobe In Design before this for my undergraduate in Graphic Design and Digital Media. So I put here something that I can find from my hard drive 5 years ago to use as a reference. I usually use In Design to create multi pages magazine or book.
Below were sample layouts for center spread that I had made before.
- 11/17/2015 09:46:00 pm
- 0 Comments
After a few amendments for my character, I finally had finalize my character design. So, for this semester, I only focus on the tiger character and will make a new story on how she changes from a baby tiger into a little girl wearing this tiger costume.
Next, I will update with my new storyboard before finally I focus on how to change this 2D character into 3D character using Autodesk Maya.
- 11/17/2015 12:01:00 am
- 0 Comments
Class tutorial with Sean today make me realize that it easier if we understand the purpose of something rather than just follow all the step.
Upper Body
So, early in the morning we start with modelling the upper body of the character from 2D drawing. Here is the basic shape of upper body of my modelling and need to add more details on it.
We start with basic shape polygon and extrude the faces to match with the reference picture.
Below is how my all four panel look from top, front, side and perspective view. After, edit all the shape and satisfied with the upper body, we can smooth it and look if we need to add any detail.
And in the middle of class the first snow in November make all of us stop for a while.
Head Modelling
For the head we start with a basic plane and make it mirror so we can adjust only with one side only.
We need to understand the basic shape of face and add more topography to give natural volume to the face modelling.
We extrude the edges to make the shape of the head completely like the reference. It was new knowledge to learn today for me.
- 11/14/2015 11:35:00 pm
- 0 Comments
New Update!
Peter and The Wolf also had a very good reference on how all the animal can have their own music instrument. The Vancouver Symphony Orchestra's music director Bramwell Tovey bring a very delightful entertaining performance as a conductor and a narrator. It was a very close reference on how I can make my shadow theater to become more alive with various music instruments.
Serge Prokofiev: Peter and the Wolf. Vancouver Symphony Orchestra
I just use this video for my research purpose only, I give you the link and credit all their hard work.
https://www.youtube.com/watch?v=MfM7Y9Pcdzw
- 11/12/2015 01:57:00 am
- 0 Comments
Lighting in Maya look same like what I had used before in 3D Max. In Maya they have 6 types of lighting such as ambience, directional, point, spot, area and volume light. But for my environment exercised this week, I just used the combination of directional, point and area lighting. You can see the red arrow of the directional lighting give the effect from outside just like a sunshine through a window. The green frame give some area lighting from inside the room.
Below are the picture of the render frame through the process by adding the right lighting.
- 11/09/2015 09:57:00 pm
- 0 Comments


