- 7/22/2016 10:30:00 pm
- 0 Comments
I am working on my camera movement with Sean the past few days. This is my rough animation and I need to tidy up a little bit of my story with some extra shot. Between the establishing shot and the time lapse shot, I've forgot to put one shot to give an idea of the story. I'll update soon with the new Pre Vis and hope will finish all the animation this weekend.
- 7/20/2016 06:00:00 pm
- 1 Comments
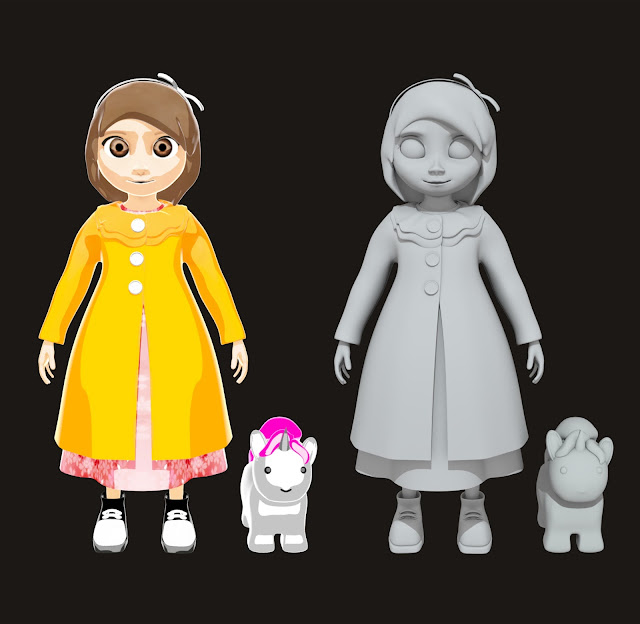
After talk with Phill last Monday, I try to render out my character in Master Beauty layer. So right now, I will render the main character in separate layer while the sub characters and asset in one layer.
Thanks to Katherine, I render an AO passes to have this second image of my character without any toon shader applied to them and it look good.
- 7/19/2016 02:00:00 pm
- 0 Comments
This is the first previs for my animation. The next step that I'll need to complete is the walk cycle for main character and sub character.
- 7/06/2016 10:00:00 pm
- 0 Comments
Today I finished my character's blend shape using Maya and Mud box. My character have a very simple face expression and do not have any lip sync. So I made several controller for the eye brow and eyes to show an expression according to the storyboard that I have. It's take me a while to make this blend shape and thanks to Katherine for helping me.
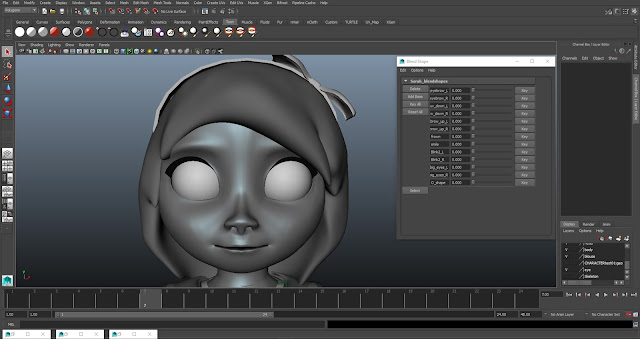
My character can even blink her eyes now and have some sad and angry face expression.
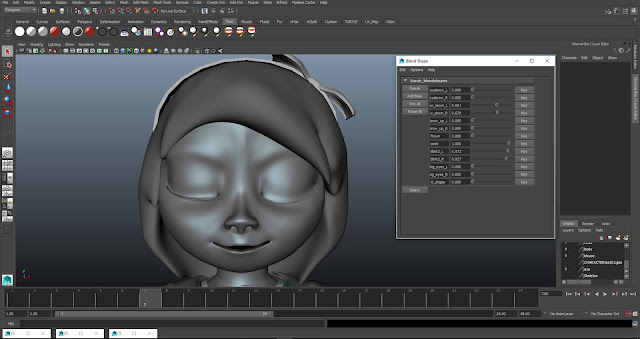
This expression will be use when she drop off her doll and left it behind.
- 6/30/2016 07:39:00 pm
- 0 Comments
So, I've focus a lot on my 2-D painting and animation and today I just read and watch all the tutorial on internet on how to use the toon shader. I've watch some tutorial that quite easy to understand and experiment with my character that I've already textured.
Basically, I just use the basic light shading for this character with the help of spotlight to highlight the light and shadow of this character. After this I will create a walk cycle and try to import into the movie format so I can see if the combination of this character can work with 2-D environment.
Here is a link of tutorial that I've used to understand on using the toon shader.
Maya Shader Tutorial - How to Create a Toon Shader
- 6/26/2016 09:57:00 pm
- 0 Comments
Right now, I have finish four background for my final animation and need to refine on the style I'm gonna used. I'm been thinking to keep the line art or just remove it. When I put the line art it give a feel of comic kind of style but I'll experiment on rendering part which one can fit together with my 3-D characters.
 |
| without the line art |
 |
| with the line art |
- 6/21/2016 09:00:00 pm
- 0 Comments
I've schedule all my painting to be done at least by the end of this month. I started with the close up painting that take roll in several shot in the center of Dundee. I still thinking either to use the real name and place in Dundee or change a little bit because I combine with different scenery of mountain in the background.
I started with colour a different tone for the building before started to paint the mountain and dragon in the front. I use Elena advice to put colour block to have a depth in this painting. I also use some tutorial of digital painting to understand the basic concept of it. So, it's still in progress and I'll try to finish it so I can start with another painting soon.
http://www.3dtotal.com/team/Tutorials_2/corridor_2d/The_Corridor_01.php (tutorial by Richard Tilbury).
 |
| In progress |
- 6/03/2016 10:00:00 pm
- 0 Comments
We start to have our own schedule for production in google spread sheet. It help everyone to see each timeline and didn't clash with others schedule when it come to render. It also help if we know when will we can help each others on their own projects. So, basically this is my production pipeline and I'm still follow the timeline for my work.
- 6/01/2016 02:35:00 am
- 0 Comments
TOY SCANDAL - 'Hunny Bunny Stole My Money'.
Going Live group project with Axis Animation, Glasgow. 16 May 2016
Going Live group project with Axis Animation, Glasgow. 16 May 2016
This is the final animation from our Going Live group project that we already presented to Axis Animation last Monday. I was satisfied with the final output and very proud to have a very talented and good teammate in this project.
- 5/20/2016 07:03:00 pm
- 0 Comments
- 5/14/2016 04:29:00 pm
- 0 Comments
4/5/2016
After meeting on Wednesday with Phillip Vaughan and our team member, I update with the latest credit roll for Going Live project. After a discussion with our team member, they agreed to stick with the scrolling panel for the end credit. They also like it have some clue about what kind of show we are referring to. So, I create something similar with the background. I add flashing light to put the end title before the name scroll from below. Elena is working right now on everyone caricature face so I will update the end credit with the latest image.
After meeting on Wednesday with Phillip Vaughan and our team member, I update with the latest credit roll for Going Live project. After a discussion with our team member, they agreed to stick with the scrolling panel for the end credit. They also like it have some clue about what kind of show we are referring to. So, I create something similar with the background. I add flashing light to put the end title before the name scroll from below. Elena is working right now on everyone caricature face so I will update the end credit with the latest image.
9/5/2016
Elena finally done to draw all of our faces and I compose again in after effect for the end credit. Here is what I already compose and now the editing team will combine with other shot in premier.
- 5/09/2016 08:23:00 pm
- 0 Comments
We start on Monday to compose the files that already come out from the render farm. We try to achieve all the aspect that Matt Cameron had teach us on Friday. But for the moving image we need to change a little bit of the node and try again another node to match with the animation. We use at least 5 to 6 image sequences such as, diffuse, master beauty, indirect, ambient occlusion, specular, reflection and depth. We then arrange and merge them to another like a chain and add another node to highlight the character.
As we explore and try different node, we use the same node with another person in the composition team to synchronize the environment. The several node that we use such as, grade to highlight the light and tone, blur and grain to make the animation less cg, zdefocus to make a tilt shift effect so the character will be more realistic and also some other node.
Below, several shot that I already done on compositing but maybe just need to be check again by other member to see the quality and consistency of each shot. I enjoy doing the compositing and a little bit surprise to learn it fast.
Shot 02
The volume ray that I had in the node help to highlight the guess who board and make it look like this scene was in the afternoon. This shot has a camera movement from the troll face and pan to the He-man walking and talking to the audiences.
Shot 06
The grain node help to make this animation look more photo realistic rather than cg. The zdefocus also help to build the tilt shift effect to make this character look tiny in this big room.
Shot 07
This three character was in the center of lens focus and adding blur image background can help them look tiny.
Shot 18
The volume ray from outside the window give an idea of the sun direction and highlight the He-man character.
Shot 28
Adding a several grade node also can help to change the mood and tone of this shot.- 5/05/2016 05:00:00 pm
- 1 Comments
Update on Going Live project, this is the end credit so far that I have done today. I try to refer from the end credit for the Jeremy Kyle show and create a border that look similar to it. I also change on how the name of our group member appear from scrolling above into move in and out from the right screen. We also agreed to change the character into our own caricature face. We will put the end credit into the TV screen and play it along with the same end song from that show.
Everyone work very hard to achieve the target in this group project and I really thankful to have such a great team. I will help them finish all the compositing in Nuke and tried to amend any changes in this end credit.
- 5/01/2016 05:30:00 pm
- 0 Comments
We learn several thing in Nuke like how to roto paint and image using the node and merge different type of image together. At first, I kind of thinking that this software will be difficult to understand but with the explanation and tutorial from Matt make me enjoy this lesson and want to explore it more.
Here, I put several image of what we learn on basic introduction on using Nuke.
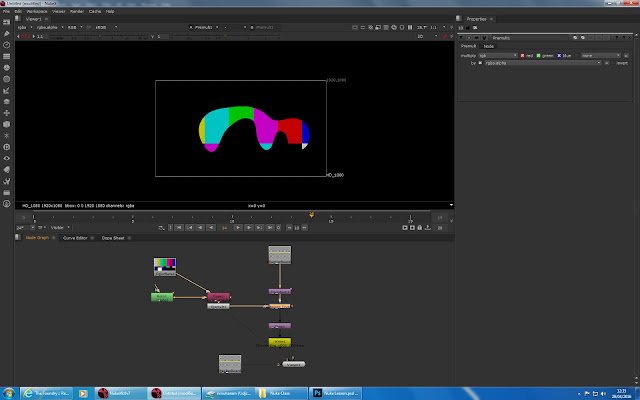
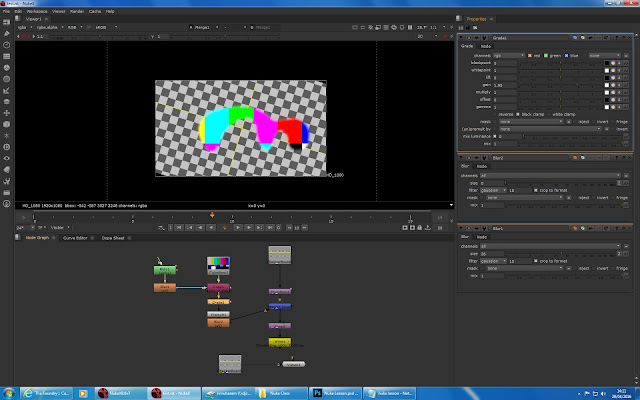
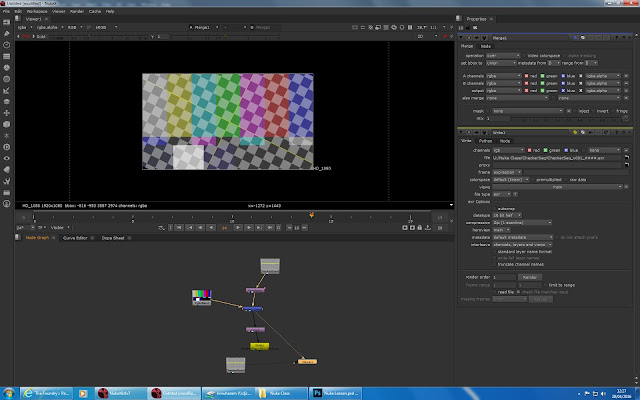
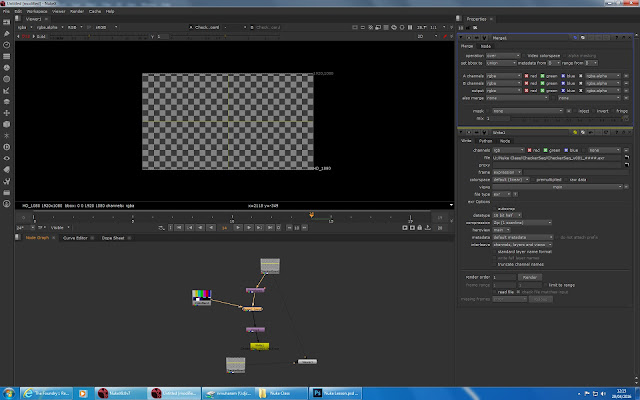
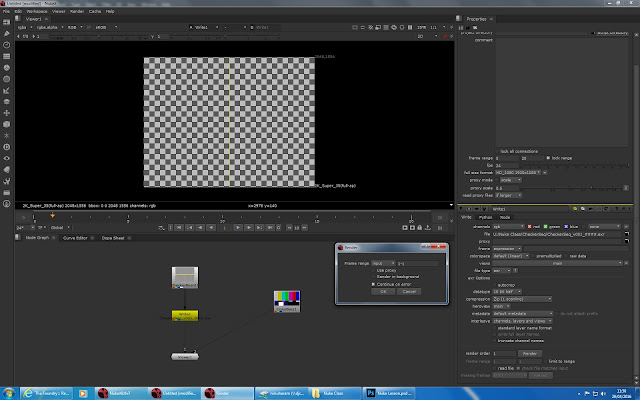
In the afternoon, he showed us the interface and start teach us on how to comp out a tracking marker with a plate from his short film. In the afternoon he show us to compose using Nuke for our going live project. He showed us how to use our depth pass to blur the background to give our shots like a tilt shift effect. He also add grain to the shot to make them look like a photo realistic.
Below is the result that Matt already got when he compose our shot 4 into Nuke and it look way more better than before with all the effect.
I start to enjoy learning this new software and we also decided to compose all of our shot in this software. So we start to compose using Nuke on Monday and it become more handy after I explore all the node and how to merge with all the passes. I will update next with all my composition that I already done in Nuke in the next post.
- 4/29/2016 10:00:00 pm
- 0 Comments
Update on Going Live project, this is the end credit so far that I have done today. I use Adobe Photoshop to create the background using symmetry triangle and use several layer for gradient, curve and colour effect. I create a multiple layer for the text before I add a several layer effect for the name and try to imitate the Jeremy Kyle Show logo. We also choose our favourite image from Guess Who board to be as ourselves in the end credit. Thanks to Elena, she would gladly to draw a caricature of our faces and I will change this after she finish with that drawing.
Next, I use after effect to compose this end credit to be play around 30 seconds. I'll try to adjust the timeline to make this end credit to be like exactly the end credit for the Jeremy Kyle Show. We also had been discuss about to put the end credit into the TV screen and play it along with the same end song from that show.
- 4/27/2016 10:55:00 pm
- 0 Comments
ANIMATION CAMPAIGN THAT EDUCATE ADULTS AND HELP THEM CONVEY METAPHORS TO
CHILDREN
The
idea of the ‘Banish the Bedroom Tax
Monster Campaign’ came after a long process. It begin with discussion and
meeting other team members to talk about who is the target audience and what
they want to achieve. They start with a board meeting and brainstorm about the
problem and they keep in touch with the media to pressure the Scottish
government about it. In this campaign in particular the use of the monster as a
metaphor helps them to convey the message to the people and the result is very
successful. People understand more about the bedroom tax and why they should be
scared of it. The success of every campaign depends on what target Shelter
Scotland wants to achieve but overall the campaigns that they have done have
become a major success. People understand more about the problem and start to
ask about solutions. They already had a talk given to high school students in
Dundee about how they help a lot of people to tackle their problems.
It is important to change people perceptions about
homeless people. People nowadays have a lot of advantages being able to use
their gadgets and technology to do some research and understand this complex
social problems. It is also very important to educate the homeless, for them to
know that they have the opportunity to have a better life. People must know
that the homeless come from the community and have been rejected. They should
have a chance to change their own life and serve the community too. We need to
educate children about helping the homeless because we need to instill good
moral values in them and help them to grow a better future.
In
the interview, the participant said about “We need to help people to understand
the real problem of homeless. It just not about people who sleep roughly on the
street every night, but people who live in poor condition of house also are
homeless”. It was a great information that helped with understanding different
meanings of homelessness. We always see the outside of the problem but never
investigate it further. The bigger issue is to educate people about the
important things in life. A proper home is very important because we need it to
provide good living condition for our children. We can have a good job but if
we lose our home it can make our life harder.
Reflecting towards my own project, we can pretend that
we don’t see things that goes wrong but everything that kids see us do will be
their guidelines to become adults. I think that helping others is important
because we can do it. We have the power to make a positive impact to others and
it is just the matter of the time, place and the heart being willing. The
reason that bad things are going on every day is because there are not enough
people doing good things. A good message can help homeless to get a better life.
This interview has given me a good point to begin my research and animation
project. I now start to investigate how an animation campaign can educate
adults and help them convey metaphors to children. In the process to produce a good metaphor in
my animation project, I hope that adults can get a better understanding on how
important they are as a role model to their own children.
http://thebedroomtaxmonster.co.uk/
- 4/21/2016 10:43:00 pm
- 0 Comments
This weekend I focus on my individual animation project. For several week we focus on our group project and I only done my storyboard and character design. We are now in the stage of rendering and need to change a little bit on animation and texture. It's a little bit tight in the schedule but I believed we are capable to help each other to finish it.
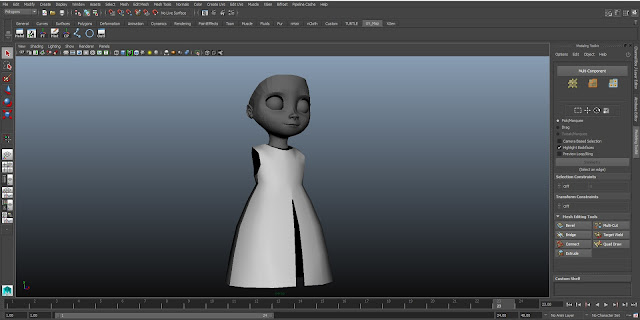
So, I start my modelling on Sarah character using Maya software and also Mudbox to sculpt the several part of the body such as face, hand and hair. I use a simple plane to structure the face on half before I duplicate and combine it together. I want to get a better result on the face, so I send to Mudbox to sculpt and smooth a little bit on her face.
After I import back the face, I start to make upper part of the blouse and also move on into her skirt. I make it separately to measure the high of the skirt for Sarah.
For, Sarah hair and hand, I sculpt it using Mudbox for the better result. Even though right now the hand and hair sculpt are not good, I will keep continue to develop the character before I move on into joint and rigging.
I put a screenshot of the model in the back, front, and side view and my character model sheet.
Sometime, I just need to put my willing to do my job until the end so I can focus to finish this modelling soon. So, here the second character that need to be finish too.
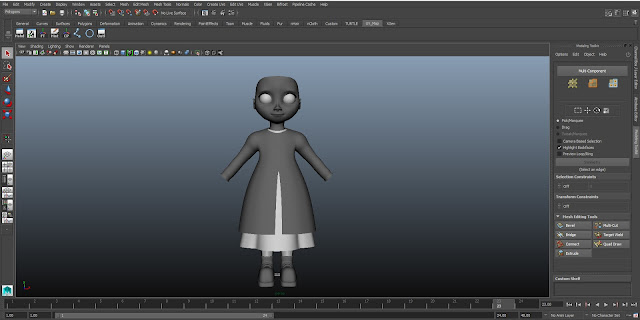
So, I start my modelling on Sarah character using Maya software and also Mudbox to sculpt the several part of the body such as face, hand and hair. I use a simple plane to structure the face on half before I duplicate and combine it together. I want to get a better result on the face, so I send to Mudbox to sculpt and smooth a little bit on her face.
After I import back the face, I start to make upper part of the blouse and also move on into her skirt. I make it separately to measure the high of the skirt for Sarah.
Next, I make the outerwear for Sarah using the same shape of the blouse. I added the long sleeves and cut open the front jacket.

Here, what the blouse and jacket will look like when Sarah wear it together.

For, Sarah hair and hand, I sculpt it using Mudbox for the better result. Even though right now the hand and hair sculpt are not good, I will keep continue to develop the character before I move on into joint and rigging.
I put a screenshot of the model in the back, front, and side view and my character model sheet.
- 4/17/2016 09:08:00 pm
- 0 Comments

